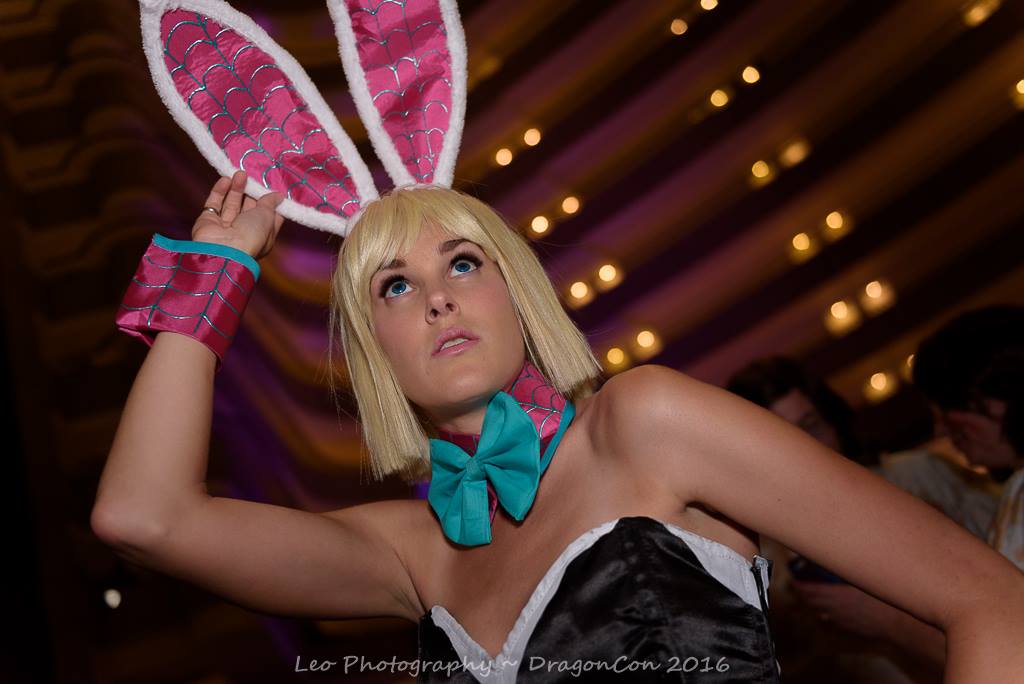
DIY Bunny Accessories
Early on this year I knew I was going to Dragon Con, and after seeing all of the fun photos from the Bunny Hutch I almost instantaneously created a Bunny-Gwen design for 2016. I didn’t have time to make my own suit myself as planned, but the accessories were surprisingly easy to make. It’s been a while since I posted a tutorial, and this one is so simple.

Materials
Materials you will need for this are simple:
- Material for cuffs in color of choice
- Material for lining of ears
- Material for outside of ears
- Material for bow
- Fusible medium weight interfacing
- Double fold bias tape
- Buttons for “cuff links”
- Headband
- 14AWG wire (I am pretty sure this is what mine is)
- Velcro
- Puff Paint (optional)
Cuffs and Collar
The cuffs and collar are similar enough that you can follow the same instructions.
- Cut the fabric to the size you need. The width isn’t important. To cut my collar I made sure the corner that would be velcroed reached all the way around my neck and then some. Same for the cuffs, but for my wrists. You should cut it on the fold of the length.
- Cut the interfacing slightly smaller than the length of the fabric. Iron to the wrong side of one half of the fabric. With the right sides together on the fold, stitch the sides of the fabric. Flip inside-out.

- Use bias tape to finish the open long edge of your cuffs and collars.

- (OPTIONAL) Use puffy paint to add the detail to your pieces.

- Add the velcro to the pieces so that they attach where necessary.
- Stitch your “cuff links” to your cuffs.
- I didn’t show how I made the bow, but you can follow the tutorial I used to make it here. I used a safety pin to hold the bow to the collar.
- You are finished!


Ears
- Shape two ear shapes into the shape you want them. Make sure to have some extra as seen in the photo. This will be to attach to the headband later. Cut your lining fabric and interfacing into the shape of just the ears. Fuse interfacing to lining.

- Glue wire onto the interfacing in the shape of the ears.

- Cut outer fabric into the shape of the ears with enough to wrap around the edges of the other side plus the extra wire length. The extra length will cover the wires so they don’t show.

- With the outer fabric wrong side facing the interfacing and wire side wrap the extra fabric around to cover the edges of the lining fabric. Stitch the outer fabric down all around the inside of the wire frame.
- (OPTIONAL) Puff paint the details onto the lining of your ears.

- This part is a bit sketchy, and I will reword it if I can think of a better way to do this. Wrap the wire around the headband and use a bunch of hot glue to make sure the fabric covers it and stays in place. Voila! Bunny ears.


That’s it. You should have the accessories you need for the perfect Playboy bunny inspired cosplay. Was this post helpful? Show me your bunny costumes! Leave a comment, and don’t forget to subscribe via email or Bloglovin’ to never miss a post.